
Passover took hours and hours of prep-work. I spent three full days of cooking. I was cooking for 17 people and that along freaked me out, but with a great deal of organization, research and patience, I was able to prepare a meal for all my guests that was not burnt or underdone and that in itself is a success! Everything above and beyond this was icing on the Passover flour-less cake!
Coming up with the menu was the easy part, find the perfect recipe was not as easy. I am worrier by nature, so I have to research every recipe online and in my cookbooks before I end up taking the leap and choosing which recipe to follow. The menu I choose for our Seder was, Homemade Chicken veggie soup with Matzo Balls, Traditional Harosets, Spicy GefilteFish and Braised Short ribs.. The side dishes provided by family members were, herb roasted potatoes, sweet veggie Kugel and sour cream fruit jello mold. For dessert we had an array of sweets, from chocolate frogs and cotton candy for the kids, to scrumptious chocolate and caramel covered matzo. We also had an apple Cinnamon cake and a decadent chocolate orange flour less cake.. And! lets not forget the French macaroons and Jewish macaroons! So much food and so little time.. All in all I was very proud of our 2010 Seder. With the help from family and friends (and of course my wonderful husband) we put together a very festive and beautiful Passover party (leaving out a few family dramas that took place along the way - this info. will be found in an entirely different blog ha ha). It was a celebration of our liberation and freedom and it was a night to eat.... drink.. and be proud to be Jewish! Here are some of the recipes followed for our Seder. I'm working on getting some of the recipes that our guests used for their delicious dishes as well..


Braised Short Ribs..
Lots of prep work and time spent in the kitchen.. So worth it! These ribs will literally fall off the bone and melt in your mouth! Be sure to cook these babies for as long as it takes (2 - 3 hours).. I prepared 28 ribs, so I obviously added more of everything.. It's all a matter of taste really. This recipe is really only a guideline, but it's the best one I found.. As it turns out, Short ribs are often served at Passover, but I would eat these any time of the year if given the opportunity! I dare you to try this, you won't be disappointed!
Ingredients
- 1 bottle kosher for Passover Cabernet Sauvignon (if not at Passover, any good Cabernet will work)
- 2 tablespoons kosher for Passover vegetable oil (regular vegetable oil will work fine)
- 6 short ribs, trimmed
- Salt
- 1 teaspoon black peppercorns, crushed
- Matzoh meal, for dredging
- 10 cloves garlic, peeled
- 8 large shallots, peeled, trimmed, rinsed, split, and dried
- 2 medium carrots, peeled, trimmed, and cut into 1-inch lengths
- 2 stalks celery, peeled, trimmed, and cut into 1-inch lengths
- 1 medium leek, white and light green parts only, coarsely chopped
- 6 sprigs Italian parsley
- 2 sprigs thyme
- 2 bay leaves
- 2 tablespoons tomato paste (don't leave this out - makes a world of difference)
- 2 quarts unsalted beef stock or chicken stock (I used chicken stock and included one can of beef)
- Freshly ground white pepper (I didn't have white, so I used black)
Directions
Pour the wine into a large saucepan set over medium heat. When the wine is heated, carefully set it aflame. Let the flames die out, then increase the heat so that the wine boils; allow it to boil until it cooks down by 1/2. Remove from the heat. This is not a scar as it seems. There was not much of a flame when I did it (with help from my husband).
Center a rack in the oven and preheat the oven to 350 degrees F.
Heat the oil in a Dutch oven or large casserole, large enough to hold 6 ribs (or if you're cooking for a large crowd, use two dutch ovens like I did and cook in batches), over medium-high heat. Season the ribs all over with salt (I use kosher salt all year round - don't be afraid to use salt - this is a special occasion and the salt really adds to the flavor) and the crushed pepper. Dust the ribs with about 2 tablespoons of matzoh meal and then when the oil is good and hot, slip the ribs into the pot and sear for 4 to 5 minutes on each side, until well browned (almost black even!).
Transfer the browned ribs to a plate. Remove all but 1 tablespoon of fat from the pot; lower the heat to medium, and toss in the vegetables and herbs. Brown the vegetables lightly, 5 to 7 minutes, then stir in the tomato paste and cook for 1 minute to blend. Now take a second to smell the wonderful aroma you have created!
Add the reduced wine, browned ribs, and stock to the pot. Bring to a boil; cover the pot tightly, and slide it into the oven to braise for about 2 1/2 hours, or until the ribs are tender enough to be easily pierced with a fork. Every 30 minutes or so, lift the lid and skim and discard whatever fat may have bubbled up to the surface.
Carefully transfer the meat to a heated serving platter with a lip and keep warm. Boil the pan liquid until it thickens and reduces to approximately 1 quart. Season with salt and pepper and pass through a fine-mesh strainer; discard the solids. It's always good to prepare this dish the day before.. The sauce only gets better! Rich with flavor, and the meat gets more tender the longer it cooks.. Absolutely divine!
Presentation: Pour the sauce over the meat. Serve with vegetables (or mashed potatoes) of your choice.
Classic Passover Charoset

Try this vegan charoset (a.k.a Haroset) recipe for the Passover festival. Vegan recipes are characterized by containing no ingredients that are derived from animals or animal by-products. This recipe has not been altered from its traditional form, it just so happens to be Vegan. The following charoset recipe is also good for your health and has been used on Kibbutz farms and settlements in Israel. It is a wonderful and healthy snack for kids (something that you will feel good about giving them).
The recipe creates a sweet and a crunchy texture. The sweet, dark-colored, chunky Haroset paste, made of fruits and nuts, is served primarily during the Passover Seder, but it can made and served all year round (my husband has requested that I make it a few times a year he likes it so much). Its color and texture are meant to recall the mortar used by the Israelites when they bonded bricks thousands of years ago when they were enslaved in Ancient Egypt. The word "charoset" comes from the Hebrew word "cheres" — חרס — "clay."
Ingredients & Preparation:
Ingredients & Preparation:
1/2 cup chopped walnuts
3 medium apples (such as Red Delicious) cored and chopped (you can peel them or leave the skin on for a touch of color)
1 tablespoon sugar (I used 1/4 Cup)
1/2 teaspoon cinnamon (or to taste)
1/4 cup of juice or sweet red wine (wine at Passover for adults and grape juice for the children)
3 medium apples (such as Red Delicious) cored and chopped (you can peel them or leave the skin on for a touch of color)
1 tablespoon sugar (I used 1/4 Cup)
1/2 teaspoon cinnamon (or to taste)
1/4 cup of juice or sweet red wine (wine at Passover for adults and grape juice for the children)
- Put all ingredients separately in food processor (or combine everything at once). If you don't have access to a food processor, just do it the old fashioned way -- really feel the history and tradition of the dish!
- Mix all the ingredients together, adding wine/sugar/cinnamon to your personal taste.
- Chill, serve, and enjoy!
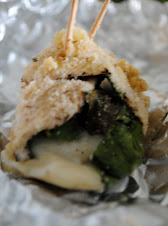
Spicy Gefilte Fish
Depending on how many people you are serving choose the number of jars to buy. There are approx. 6 fish in a jar.
Fry the fish a bit to brown, not in the liquid, in a little oil or something
Remove, then
Fry onions and either fresh garlic or granulated till brown/soft
Small can of tomato sauce and Tabasco to taste, add about half of the liquid stuff from the jars
Once you get to a slow boil, turn heat down and simmer with fish for another 15 minutes.
I recommend cooking it a day before, so all the spices have time to soak into fish.
Everything is better the next day.
Then you can serve it cold or hot.


Matzo Caramel Crunch

Thanks to my sister, Carly Garland, Matzo Caramel Crunch is now officially my favorite Passover treat. If you are invited out for a holiday meal, this addictive Pesach dessert makes the perfect hostess dessert or gift
Ingredients & Preparation:
- enough matzos to cover the bottom of a jelly pan (if you don't have a jelly pan a cookie sheet should work)
- 1/2 pound butter (much preferred over pareve margarine)
- 1 cup brown sugar
- 1/2 cup chopped nuts (walnuts, pecans, or almonds) - Optional (we don't add the nuts)
- 2 cups (or enough to cover the matzos) chocolate chips (go crazy!)
1. Cover a large jellyroll pan with aluminum foil. Spray well and line with parchment paper.
2. Lay matzos flat in the prepared pan. Be sure theentire pan bottom is covered with matzo, trimming matzo if necessary.
3. Combine butter and sugar in a pot on the stovetop. Bring to a boil for 5 minutes, stirring constantly.
4. Pour butter-sugar mixture over matzos. Bake at 350 degrees Fahrenheit for 10 to 15 minutes, watching carefully to prevent burning.
5. Sprinkle chocolate chips over hot brittle. Let the chocolate melt, and then spread with a knife.
6. Top with chopped nuts. Drizzle chocolate (dark or white) over the nuts.
7. Refrigerate.
8. Break into pieces.. serve.. Savor!!


L'Chaim!
To Life!!


