Monday, December 21, 2009

Two Hanukkah dishes to share...


Hanukkah was wonderful this year. We hosted a family party and for the first time ever, I timed everything right! This was mostly due to my husband (Shaun). Shaun helped me manage my time. The first dish I prepared was home made Apple sauce.  I'd never made it before, but my sister had attended a Hanukkah party earlier in the week and told me how tasty the home made sauce compared to the store bought. Since, I'm always interested in trying something new,  I decided to give it a try. It turned out so yummy! Fresh and sweet and with so much more texture.  I highly recommend making home made (FRESH) apple sauce (it's super easy!!)..


I also ended up making a wonderfully tasty corned beef. I was nervous about making it, but I've heard that corned beef is fairly fuss free and easy. I don't know about you, but I LOVE eating good corned beef.  Jews are known for enjoying a nice corned beef on Jewish Marble rye, so I decided to serve it for my family Hanukkah party. The recipe I used called for beer, and since I've never actually cooked with beer, I was a bit apprehensive, but it turned out to be super easy and the end result was outstanding! My husband told me it was the best corned beef he'd ever had. This recipe is a keeper! Enjoy the recipes...


Apple Sauce Recipe
Preparation time: 45 minutes. The sugar amounts are just guidelines, depending your taste, and on the sweetness of your apples, use less or more. If you use less sugar, you'll likely want to use less lemon juice. The lemon juice brightens the flavor of the apples and balances the sweetness.


Ingredients
  • 3 to 4 lbs of peeled, cored, and quartered apples. (Make sure you use a good cooking apple like Golden Delicious, Granny Smith, Fuji, Jonathan, Mcintosh, or Gravenstein.)
  • 3 inches of cinnamon stick
  • 1/4 cup of dark brown sugar
  • up to 1/4 cup of white sugar
  • 1 cup of water
  • 1/2 teaspoon of salt
  • 1/3 cup maple syrup 

  • METHOD
1 Put all ingredients into a large pot. Cover. Bring to boil. Lower heat and simmer for 20-30 minutes.
2 Remove from heat. Remove cinnamon sticks. Mash with potato masher.
Ready to serve, either hot or refrigerated. Delicious with vanilla ice cream or vanilla yogurt.

Hanukkah Corned Beef 
Slow Cooked Corned Beef for Sandwiches Recipe

INGREDIENTS

  • 1-1/3 (3 pound) corned beef briskets with spice packets 
  • 1-1/3 (12 fluid ounce) bottles beer (I used guinness)
  • 1-1/3 bay leaves
  • 2 tablespoons and 2 teaspoons peppercorns
  • 2/3 bulb garlic cloves, separated and peeled


METHOD
  1. Place the corned beef briskets into a large pot. Sprinkle in one of the spice packets, and discard the other one or save for other uses. Pour in the beer, and fill the pot with enough water to cover the briskets by 1 inch. Add the bay leaves, peppercorns and garlic cloves. Cover, and bring to a boil.
  2. Once the liquid comes to a boil, reduce the heat to medium-low, and simmer for 4 to 5 hours, checking hourly, and adding more water if necessary to keep the meat covered.
  3. Carefully remove the meat from the pot, as it will be extremely tender. Set on a cutting board, and allow it to rest until it firms up a bit, about 10 minutes. Slice or shred to serve. I discard the cooking liquid, but it can be used to cook cabbage and other vegetables if desired.


Saturday, December 5, 2009

What's For Hanukkah Dinner?


Yes, it's that wonderful time of year! 
Chanukah is just around the corner. I know the holiday season is officially here because my husband has graciously taken the decorations down from the attic, without me even having to even ask - it's a hanukah miracle!  (Yes Virgina, Jews do decorate for the holidays)! Blue, silver, gold, and sometimes yellow are the traditional colors of  this festive holiday. When you see someone's house decorated with blue lights instead of white, red, or green it's probably a good indicator that the folks inside may very well be celebrating the "Festival of Lights," Chanukah! Inside their homes (and mine) you might find sparkling six-pointed stars, dreidels, lights, and menorahs, all carefully placed around their homes  ~ awaiting the cherished celebration. You might also find a few shiny gold wrapped chocolate coins (but those won't last very long). Now that the stage has been sit, all we can do is wait.. Soon we will be indulging in the tastes of savory friend Potato Pancakes (Latkes!), scrumptious Jelly filled donuts,  cream filled sweet blitzes, and more traditional Hanukah foods! I don't know if you've caught on yet, but there is a theme to the food prepared at Hanukkah. Besides satisfying everyones sweet tooth, the Festival of Lights is celebrated by eating foods cooked in oil! The foods of Chanukah are fried in oil to symbolize the great miracle of the oil that lit the Jewish people's way to victory so many years ago...  This is not a very good description of the Jewish Holiday.. To find out more, check out the following website: http://judaism.about.com/od/chanukah/a/hanukkahstory.htm


What's cooking at Hanukkah (Chanukah)


LATKES LATKES LATKES!!!


INGREDIENTS      
1 vitamin C tablet
2 tablespoons hot water
2 1/2 pounds peeled russet potatoes
1 peeled onion
2 tablespoons matzo meal
2 large eggs, lightly beaten
1 teaspoon salt
1/4 teaspoon baking powder
Vegetable oil, for frying
Applesauce and/or sour cream, for serving


INSTRUCTIONS
  1. Place vitamin C tablet in a small bowl with hot water and stir to dissolve (A little orange or lemon juice will work also). Shred potatoes first using the shredding blade and then the metal blade of a food processor (or use a hand shredder). Add to vitamin C mixture.
  2. Shred onion in the food processor just as you shredded the potatos; add to potatoes. Add matzo meal (Flour can be substituted), eggs, salt, and baking powder and stir until incorporated.
  3. Pour 1/4 to 1/2 inch of oil into a large frying pan and heat over medium-high heat. Once oil is to temperature (you can check by sticking a wooden utensil into the oil and seeing if bubbles form), spoon 2 tablespoons of the potato mixture into the hot oil. Do not crowd the pan. Flatten latkes slightly with the back of the spoon.
  4. Fry pancakes until golden on both sides, turning once. When you reach the end of the batter, pat the mixture with a paper towel to remove excess liquid.
  5. After frying, remove the pancakes to paper towels to drain. Season with additional salt and serve with applesauce and/or sour cream, if desired. Pancakes may be kept warm in low oven on baking sheet in a single layer for 1 hour.  Now Eat My Darlings!!!


    QUICK AND EASY JELLY DOUGHNUTS (SWEET SUFGANIOT)!!


    This recipe is designed for those who want to have doughnuts at the holiday, but need to save some time.. Perfect cooking project for the kids.. We like to get the whole family involved.. These are so good!! Enjoy!!


    INGREDIENTS                                                                        


    1 package Pillsbury Biscuits 
    Lots of canola oil
    Strawberry, Grape, or your favorite jelly 
    Confectioners sugar (to coat)
    Optional - 2 large carrots, chopped into big slices (to help absorb the oil)
    Optional - Doughnut Toppers (your favorite sprinkles, etc..) 


    INSTRUCTIONS                                             
    1. Put canola oil in a large frying pan and heat to medium (fill about half way).
    2. Add carrots slices.
    3. Separate biscuits, fill each biscuit with teaspoon of jelly
    4. Fold up the biscuits (just pinch edges together to form balls)
    5. Add the biscuits, a few at a time so they don’t overfill the pan.
    6. Lightly fry the biscuits until golden brown, about 2 minutes.
    7. Remove from the pan and place on a plate. (Line the plate with a paper towel to absorb the remaining oil.)

    THE CELEBRATION OF CHANUKAH LASTS FOR 8 DAYS.. COME COOK WITH ME.. SHARE YOUR HOLIDAY FAVORITE RECIPES AND STORIES!! 

    HAPPY HOLIDAYS... NOW EAT MY DARLINGS!!!

    Friday, November 27, 2009

    Pumpkin Roll...

    Looking for a wonderful holiday treat? Look no further! This Pumpkin Roll is simple to make once you get the hang of it and tastes divine. I made this dessert for Thanksgiving and gave them out as holiday gifts to family members. Pumpkin is such a wonderful flavor in desserts (one of my favorites) and this roll is a great alternative to pumpkin pie or in addition to pie... Seriously, why have one dessert, when there are so many sweet treats to sample out there! don't you agree? Enjoy!!!

    Pumpkin Roll
    Baking supplies:
    Jelly Roll Pan, Mixer, Large Bowl, Wire Whip, Measuring Cups, Measuring Spoons, Spatula, and, Frosting tool 
    Cake:
    1/4 C flour
    1 t baking powder
    2 t cinnamon
    1 t pumpkin pie spice
    2/3 C pumpkin
    1/2 t nutmeg
    1/2 t salt
    3 eggs
    1 C sugar
    Cream Cheese Filling:
    1 C powdered sugar
    1 8 oz. pkg. cream cheese, softened
    6 T butter, softened
    1 t vanilla
    ~~~~~~~~~~~~~~~~~~~~~~~~~~~~~~~~~~~~~~~~~~~~~~~~~~~~

    1. (Preheat the oven to 375 degrees)
    Put the eggs and sugar in a mixing bowl and beat on high for at least 4-5 minutes (it took me almost 15 minutes with my kitchen aid). You want the mixture to turn nice and creamy white (or very light yellow).
    2. Add the pumpkin and mix until incorporated.
    3. In a separate bowl mix the dry ingredients.
    4. Add the dry ingredients into your mixing bowl and mix until well combined.
    5. Pam & Bakers Joy sprays have flour added and are great for baking. Spray a little circle of it in the center of a jelly roll pan before lining. Line the pan with a piece of wax paper and then spray it with cooking spray. Not to heavy, just a light coating. 
    6. Spread the batter out evenly over the wax paper. "Evenly" is the key here. You want it to be as smooth as possible.
    7. Bake at 375 degrees for 15 minutes.


    8. While the cake is baking, lay out a clean dish towel onto your counter. 
    9. Sprinkle powdered sugar all over the dish towel.
    10. As soon as the cake is finished baking, carefully loosen the edges with a knife and then dump it onto the dish towel.

    11. Remove the wax paper.
    12. Cut off any jagged edges.
    13. Roll it all up! Set it on a wire rack to cool.

    14. While the roll is cooling make the filling.
    15. Beat the cream cheese and butter together for about 2 minutes, or until smooth.
    16. Add the other ingredients and beat until smooth and silky.
    17. When the cake is completely cooled, unroll it and spread the frosting evenly over the top. I only put a light layer of frosting on. The first roll I made was far too sweet.

    18. Roll it all up again and lay it seam side down on top of some plastic wrap.
     
    19. Wrap the roll in plastic wrap and then in tin foil.
    20. Refrigerate for at least 3 hours. They freeze very well and make wonderful holiday treats to share.


    Sunday, November 22, 2009

    Tuscan Bread Soup


    There are many recipe variations for Tuscan Bread Soup - made by Italian grandmothers everywhere. The recipe I use is fairly simple, but oh so good! With an aromatic combo of garlic and onions and a touch of cream for richness, this delicious and savory soup is the perfect Italian comfort food! I've served this as a first course for family and friends, as well as, a delicious & filling meal for just my husband and I. Try it while the weather is cold and rainy.  I guaranty you'll be glad you did.


    What you need:


    4 slices crusty Italian bread, 1 1/2 inches thick
    4 tablespoons extra-virgin olive oil, plus extra fro drizzling
    1 large onion, chopped (my husband has asked for less onion in the serving bowl, but loves the flavor of the broth)
    6 garlic cloves, minced
    6 cups chicken broth
    1/2 cup heavy cream
    1 teaspoon minced fresh thyme (or 1/2 teaspoon of dried)
    salt and pepper
    1/2 cup grated Parmesan cheese (I use shredded)
    Directions:
    1. Adjust oven rack to middle position and heat oven to 475 degrees. Place bread slices on baking sheet, brush tops with 1 tablespoon oil (give or take, and bake until golden brown and crusty, 8 to 10 minutes.
    2. Meanwhile, heat 3 tablespoons oil in Dutch oven (or heavy pot) over medium-high heat until shimmering. Add onion and cook until lightly browned, 8 to 10 minutes. Add garlic and cook until fragrant, about 30 seconds. Add broth , cream, and thyme and simmer until onions are softened, about 10 minutes. Season with salt and pepper to taste.
    3. Cut bread into 1-inch chunks and place in soup bowls. Ladle soup over bread, sprinkle with Parmesan (I tend to use a lot of cheese), and drizzle with olive oil. Serve - YUM!


    Kitchen Notes:

    • Use day-old or slightly stale bread—it will hold up better than fresh bread when the soup is ladled on.
    • If your soup bowls are ovenproof, place the soup under the broiler for a few minutes just before serving to melt the Parmesan cheese and add a chewy crust.
    • If you prefer, substitute ¼ teaspoon minced fresh rosemary for the thyme.

    Thursday, November 12, 2009

    Chocolate Crinkles


    About a year ago I found this recipe for Chocolate Crinkle cookies.  I don't know why it took me so long to make these little life savers, but I'm so glad I finally did. Truth be told, yesterday was a horrible day at work and I'm pretty sure that chocolate was my only way to self-medicate! These cookies are a little piece of chocolaty heaven.. they (without a doubt) will turn any frown upside down!

    Beneath the crackled, powdery surface of these delicious cookie-brownie hybrids, is a soft, chewy, melt in your mouth interior. Don't wait a year to make them, like I did.. These cookies are the perfect  holidays treat!

    NOTE: One thing I've learned over the years (the hard way) is to read a recipe completely before starting. For instance, If you were to start this recipe without reading the instructions, you would find that the cookies will take 2 hours longer then you planned, since the dough needs to be refrigerated for two hours before baking... Anyway, this is my helpful hint of the day..

    "Chocolate Crinkles"

    ingredients

    3/4 cup butter, melted
    1/2 cup unsweetened cocoa powder (I used Trader Joe's brand)
    1 cup of sugar
    2 eggs (I use organic and cage free)
    2 teaspoons vanilla extract
    2 cups of flour
    1 teaspoon baking powder
    1 teaspoon baking soda (I used Trader Joe's brand)
    1/2 teaspoon salt
    6 ounces min semisweet chocolate chips (I only had Ghiradelli regular size, so I chopped them down to size)
    3/4 cup confectioners' sugar

    tools

    teaspoon
    measuring cup
    wire rack
    cookie sheet
    flat surface (plate) for confectioners' sugar
    timer

    directions 

    In a large bowl, mix together the melted butter, cocoa powder, and sugar. Whisk in the eggs and vanilla extract. In a medium-size bowl, stir together the flour, baking powder, baking soda, and salt. Use a large spoon to slowly add the dry ingredients to the chocolate mixture. Stir in the chips. Refrigerate the dough for 2 hours.

    Heat the oven to 350. Form the dough into 1-inch balls, then roll them in confections' sugar. Bake the cookies on an un-greased baking sheet for 10 minutes. Set the baking sheet on a wire rack for 5 minutes. Set the baking sheet on a wire rack for 5 minutes, then lightly dust the cookies with the remaining confectioners' sugar. Transfer the cookies directly onto the rack to cool thoroughly. Makes around 4 dozen (I recommend doubling this recipe...).

    Enjoy!

    Tuesday, November 3, 2009

    Getting Back to Basics...


    I know it may seem old fashioned, but every holiday season when I'm baking  in the kitchen, I like to wear my bubbie's kitchen apron (Bubbie is the Jewish term for Grandmother). Wearing her apron makes me feel close to her and it makes me feel like I'm part of something bigger than myself. I enjoy feeling like I'm connected to the history and traditions that have come and gone before me. It is my way of helping the memories live on. That is is also why every year at Chanukah (pronounced Hanaka) I like to make my Bubbie's special "Sour cream Chocolate Cake" and her wonderful "Magic Cookie Bars." These treats bring back warm memories of my loved ones and the holidays that have past.

    Whenever I speak to friends and relatives about those they have loved and lost, someone will undoubtedly bring up a food in association with that person they have lost (especially, if it's an aunt, a mother or a grandmother). When friends and family spend time together, their time together frequently takes place around a table. Food is essential to life... and that is why so many of us connect family memories to the special dishes and recipes they shared with those loved ones. This is also why many people hold on to their family recipes so tightly (think about that next time you ask someone for their great-grandmother's strudel recipe).

    Tradition is not always spoken about in today's world, but in my humble opinion, traditions are vital for keeping family connections strong, and for making holiday gatherings more than just about the gifts warped in shiny paper. Gifts can come in many shapes and forms, and every year I enjoy the gifts that my grandmother (my Bubbie) passed on to me. She may not know it, but I will never forget.

    With the holiday months quickly approaching, let's start a list of baking essentials that may come in handy.  Please email me more suggestions for what to stock up on in the kitchen (just click on the envelope bellow this post). And, please be sure to send in your favorite Thanksgiving, Chanukah and Christmas recipes (or recipe requests) as well!  Here's to spreading cheer with all the holiday sweets we are going to make!


    Just print the list and take it with you! 
    Trader Joe's is always adding to their baking goods and they offer great quality at a great cost and Walmart offers the best prices on the brands most often used, but If you're seeking quality over price, try Corti Brothers on Folsom Blvd.


    Non-Perishables:
    Semi-sweet Chocolate (chips/bars/etc...)
    Walnuts/Pecans/etc...
    Sugar
    Oil
    Baking Soda
    Baking Powder
    Cocoa Powder
    Cornstarch
    Cake Flour
    Flour
    Brown Sugar
    Powdered Sugar (A.K.A. Confectioners Sugar)
    Cream of Tarter
    Yeast
    Frozen Puff Pastry
    Vanilla
    Coconut (shredded)
    Graham cracker Crumbs
    Pie Crust
    marshmallow Cream
    Sweetened Condensed Milk
    Splenda
    Pumpkin Spic
    Nutmeg
    Allspice
    Cinnamon


    Perishables:
    Eggs
    Half & half
    Heavy Whipping Cream
    Milk
    Butter
    Marshmallows
    Shredded Coconut
    Pecans
    Walnuts


    Extra Items:
    Toothpicks (for testing baking goods)
    Good/safe Oven Mitts


    My Bubbie & Zaide


    Saturday, October 31, 2009

    How to make roasted garlic

    I think the only thing that smells as savory and beautiful than home baked bread is garlic roasting in the oven. I make roasted garlic to add to pasta sauces, salad dressings, and butter or olive oil to slather it warm french bread... happiness is served.
    Making roasted garlic

    Roasted garlic is much more mellow and gentle than raw garlic. It has a sweet flavour to it, and therefore makes it even enjoyable to those who have sworn off the garlic because of it's harsh or strong raw flavor. Plus, it's easy to make!

    Cut the tip off an entire head of garlic (see above). Put on a piece of aluminum foil.


    Making roasted garlic
    Drizzle with some olive oil and sprinkle with salt and pepper. You can add herbs if you like.


    Making roasted garlic


    Gather & slightly twist up the aluminum foil, You can leave a "slight" hole on the top for steam to escape (but if you're worried about oil splattering in your oven, it's fine to twist the top closed). The whole in the above photo is exaggerated to show what is being described.  You can place the wrapped garlic directly on the oven rack, or place on a cooking sheet. Roast at 325F for about an hour. The garlic should resemble the photo bellow when it is done. If the garlic is still a white or cream color, you may keep it in the oven a bit longer, but be sure to keep an eye on the time.


    Making roasted garlic
    Voila, there you have beautiful caramelized garlic!  Your home will smell heavenly as well! Or at least I think so, my husband and I are huge garlic fans, so we truly enjoy the sensuous aroma..


    Making roasted garlic 
    The cloves pop out easily. From there you can create a garlic paste to use in your favorite sauces, dressings and spreads. Nice restaurants charge a lot for "mashed potatoes with roasted garlic" but you can make it at home for pennies! Just add the roasted cloves, some  half & half, salt and pepper, mix in your mashed potatoes, and enjoy the creamy delicious results!


    Photos by Susie Ridler

    Tuesday, October 27, 2009

    Benjies... an oldie but a goodie!


    For my 40th Birthday my family and I took a trip to Southern California. During our stay, one day was reserved for spending time with my dad. On this special day, my dad and my husband and I found ourselves in search of a Jewish deli (I was  jonesing for a piled high corned beef sandwich. I didn't know my way around Southern Cal, and had no idea where we could go. All I knew was that I was having a serious craving for some good old fashion Jewish deli food (a.k.a "Comfort food). As my husband searched for locations in his iphone (what a handy little gadget)he came across "Benjies," a New York Deli style Restaurant, located not far from where we happened to be. Even better, it turns out Benjies Restaurant is located in the city my dad grew up in, and it has a family history! As it turned out, my dad and his dad (my grandpa) used to eat at Benjies when they lived in Southern Cal (over 30 years ago). What a perfect location to celebrate my birthday. 


    Benjies is a classic!  Well worn, outdated and truly vintage.... just like an old style deli should be, with all of your deli staples (even an over bearing, "tell it like it is," New York style server to complete the experience). From the moment I walked into the restaurant and bestowed my eyes on all the scrumptious deli items and desserts, I knew we'd come to the right place! I'm not sure, but I think being Jewish must go hand in hand with craving matzoh ball soup, knishes, deli meats, pickles, latkes, and sweet macaroons. Benjies definitely fit the bill! Benjies menu is packed cracker jack full of all the traditional Jewish comfort foods: Pastrami on rye,corned beef and coleslaw, potato latkes, chicken motzo ball soup, and much much more! They even place sliced kosher pickles on your table (instead of bread, hello, can you say "delish!"). And, for my dad, who happens to be a Vegan (a diet with no animal products, i.e., meat or dairy) they even offered him a nice big plate of pasta with marinara sauce. As for me, well, let's just say my corned beef craving was more than satisfied, as well as, my sweet tooth! I enjoyed an extra rich, creamy, and delicious Napoleon to top of what was already a wonderful birthday! 


    "Oy" our bellies were so full when we left this joint!! And, Oh do I wish I could go back tomorrow and do it all over again!! I even left with a souvenir ! A Benjies t-shirt that just so happens to says, "Celebrating 40 Years of Excellence..." now you tell me it was not fate (granted, the shirt was 2 years old, but that's not the point:)!


    Ahhh Benjies, what a wonderful memory! Thanks DAD!!


    If you're ever in the neighborhood!
    Benjies, New York Deli Restaurant
    1828 N. Tustin Ave.
    Santa Ana, California
    www.benjiesdeli.com/


    Monday, October 12, 2009

    Mediterranean Pasta Salad Ideas

    Greetings and Salutations..

    I received my first recipe request (Whoa!) for a Mediterranean pasta salad recipe.. And, I just happen to have a couple of recipe ideas to share... A while back my husband and I visited some friends in Seattle WA. Well, the hostess of our little gathering is very well known for her masterful culinary works of art.. And, she did not let us down.. We were presented with an amazing pasta salad (antipasto dish).. I later asked her for the recipe, and here's what she sent me (word for word.. And, please don't be fooled by how caviler she may seem, this dish is really fantastic & offers a great presentation!).. All I can say is you (and your guests) will not be disappointed..I will also post a pasta salad that I make from time to time and never get tired of.

    For those of you who are wondering, when we speak of a Mediterranean Pasta dish (or other Mediterranean dishes) we are referring to three specific continents, Europe, Asia, and Africa. Since the Mediterranean covers a large geographical area, you can imagine how many different variations of pasta salad are out there.. If you know of a Mediterranean dish that you think really "hits the spot," please submit your recipe (just click on the little envelope at the end of this posting and share (remember, "Sharing is Caring!").

    Robin's (the bomb) Antipasto:
    "There really is NO recipe...I just throw a pound of crap in a bowl. Like a jumbo antipasto. I will try to list some of the things I use, anything can be opted out!"

    Jumbo pasta (cooked and cooled under cold water, rinsed)
    Italian Dry salami (or any kind of Turkey or Beef salami)
    Heart of palms cut into 1 inch pieces (canned)
    Artichoke hearts cut up or quartered standard artichokes (canned)
    Baby Corn (canned)
    Any kind of olives
    Tomatoes
    Carrots (cut up) or petite
    Celery
    Pickled mushrooms (or oil soaked)
    Pickled green beans or pea pods
    Red Pepper (or the roasted in the jar kind)
    Banana peppers
    Pickled Cauliflower
    Variety of cheeses...you can use tiny mozzarella balls, or any number of non-mushy cheeses...Jarlesberg, Swiss, Gouda...name it (talk to your cheese guy)
    Garbanzo beans (canned)
    Paul Newman Balsamic salad dressing

    So, you take any number of things on this list, Throw it in a large Ziplock bag and pour some Paul Newman over it. It can be made the night before or Days before...
    Best served with a crusty baguette or crackers. Use as appetizer or main course salad. People think you are a super hero but all it really is is opening cans and throwing shit in a bag. If you accidentally put in too much dressing, drain the bag before serving. The whole thing takes five minutes. I always keep the ingredients in the pantry in case there is company."

    ---- courtesy of Robin, Seattle WA.
    _____________________________________________________

    As for the Saucy Chef...

    With some help from recipes and friends, I've been making this pasta salad dish (or variations of it) for a few years now. It's as simple or as time consuming as you want to make it. The more you add, the more you chop, the more you chop, the more time it takes. It's a pretty basic pasta salad recipe, but we always enjoy eating it for days (lunch & dinner)..

    What you'll need: Large pot for boiling pasta, Large bowl for mixing salad, Wooden spoon, and a sharp knife

    Ingredients:
    Bell peppers (green, red, and orange peppers for a colorful salad, and only green peppers if you want to keep the cost down).
    About 1/2 cup of Olives (I use a combination of kalamata olives and traditional black. You can add green ones if you're a fan. Whole looks prettier, but sliced goes further
    Mozzarella cheese -cut into cubes (or buy the pretty round balled mozzarella)
    one bunch Broccoli (I usually blanch - or cook until soft) Just add the broccoli it to the boiling pot of pasta near the end of the pasta cooking time.
    Pasta Noodles (colorful spiral noodles (Rotini) or Farfalle (Bow tie) noodles look great, but choose the past you prefer.
    About 1/2 Cup of Paul Newman's Cheesy Fantastico Salad Dressing
    Best Foods Mayo
    2 teaspoons Italian Herbs (any or all of the following‚ garlic, Italian seasoning, Thyme, and/or basil)
    handful of Pine Nuts and/or Sun Dried tomatoes (optional, but great additions)

    In large bowl pour about 1/2 cup of salad dressing and a few Table Spoonful's of mayo. Sprinkle Italian seasonings (garlic salt/powder, Basil, Rosemary, etc.)and salt, pepper into the mixture and blend well. ** Add the pasta last, after all veggies & seasonings have been smothered in salad/mayo dressing** You want it to be creamy.

    Add the pasta noodles and mix all the ingredients together well. Add more salad dressing and Mayo if needed (I usually add more dressing and mayo and herbs until It's the taste good to me).. Add anything that tastes good to you.. I try to put as much color as I can into the salad, but for some people the simpler the better. You can use fresh bell peppers for a little crunch, or you can cut them in half, brush with olive oil and broil on high for 10/20 min. (then cut into chunks or strips and add to mayo/dressing). I usually just use the fresh & raw bell peppers, but sometimes I like to mix things up a bit..

    To cut down on time if need, use packaged chopped bell peppers and broccoli (Trader Joe's & most grocery stores offer veggies in a bag now if you're so inclined).. This cuts the time in 1/2.. I enjoy the process of chopping if I have the time, but if time is of the essence, there is not shame in getting a little help...

    I recently started to add some chopped fresh basil to the mix at the end (but that's up to you). I also add Parmesan cheese as a final touch.

    NOTE:
    Other ingredients to use when trying to really "spice things up"
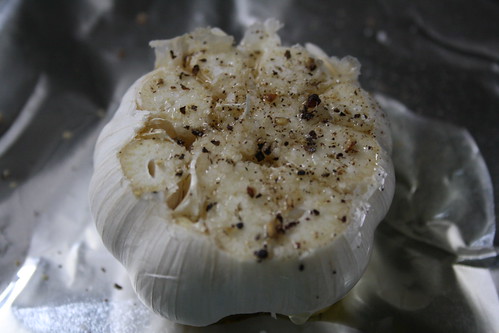
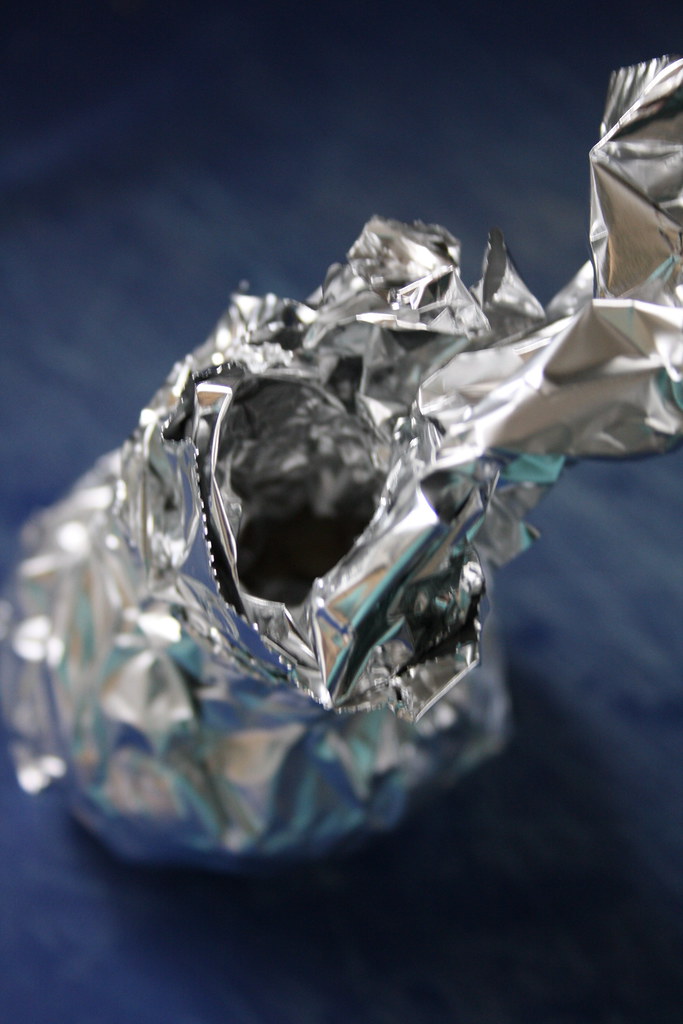
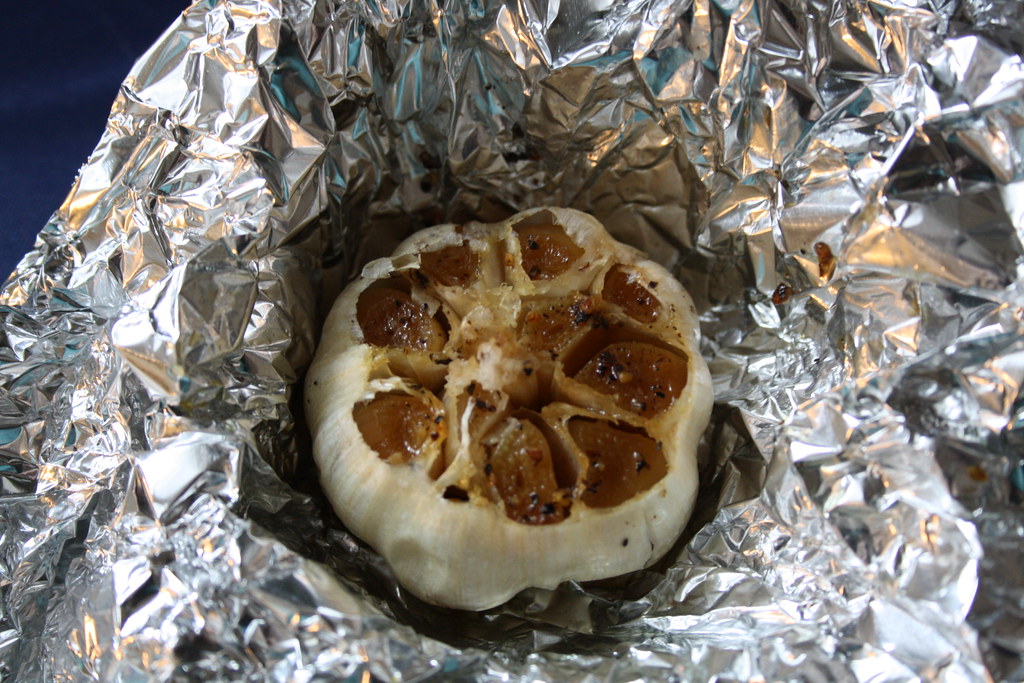
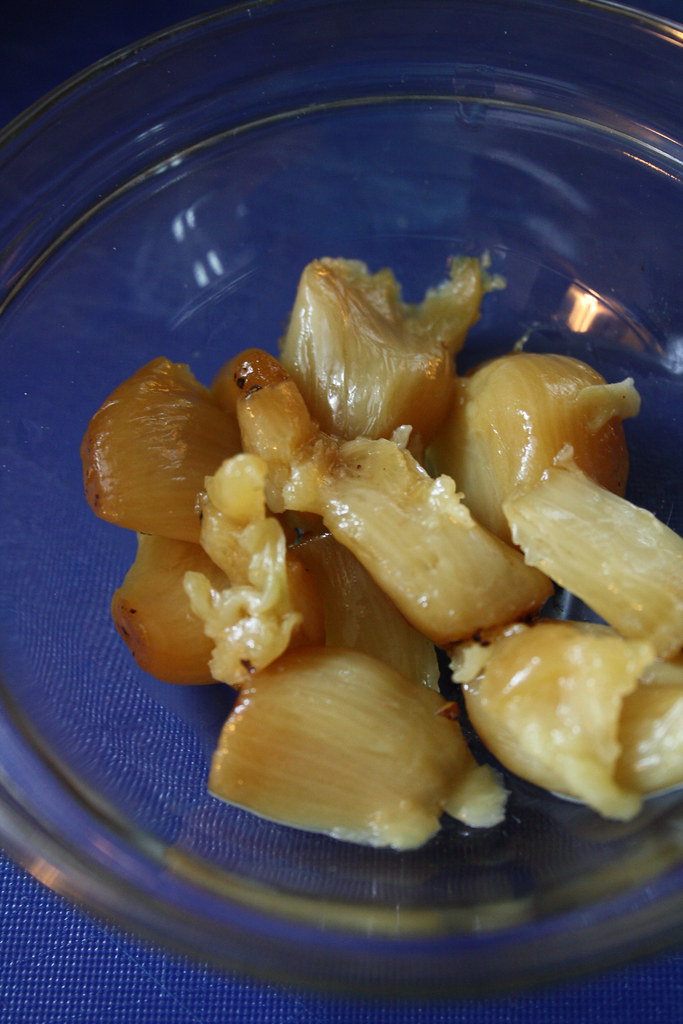
    Artichoke hearts from a can (chopped), roasted garlic (roasted w/olive oil in tinfoil in oven on broil set at High for about 25 - 30 min). You can also add some kind of Italian meet (salami, etc..). I've also made this salad with pesto as well. It's really up to you.

    Now, go and eat!!

    Saturday, October 10, 2009

    Hungarian Chicken Paprika Stew with Tomato's / Paprikas csirkeporkolt pardicsommal

    Tonight The Saucy Chef (and her hubby) traveled to the little country of Hungry.. Well, at least our taste buds did some traveling. If you are like me, you may not know very much about the food, culture, and people of Hungry.. Here's what I learned though my culinary travels today.. The best-known ingredient in Hungarian food is the red-powdered spice called paprika (there is an actual Hungarian Sweet Paprika). It is used to flavor many dishes. Other staples of Hungarian cooking include onions, cabbage, potatoes, noodles, and caraway seeds (all available here in Sacramento. Both cream and sour cream are used heavily in Hungarian food. Dumplings (dough wrapped around different kinds of fillings) are very popular as are cabbages or green peppers stuffed with meat and rice. Another favorite is the pancake called a palacsinta. It is often rolled or wrapped around different kinds of fillings.

    Travel sources indicate that the country of Hungary is the ideal place for anyone wishing to enjoy a spa or wellness vacation. Each year thousands of visitors seeking rest and rejuvenation travel to the country's spa cities, which are famous for their natural healing thermal waters.
    Apparently, if you travel to Hungry, you don't want to miss all of the gastronomic delicacies, for example Goulash soup, stuffed cabbage, paprika chicken(the dish we tried tonight!), roast duck, the famous letcho, and for dessert the sour-cherry strudel.

    Chicken Paprika Stew with Tomato
    (Paprikas csirkeporkolt paradicsommal)

    The recipe includes directions for making traditional dumplings to go with it, but I served it on wide noodles. Hopefully I'll try to make the home made dumplings next time..

    Original recipe taken from June Meyer's cooking Hungarian website. Again, I cut this recipe in half (for two). We enjoyed it so much I'm planning on making a full batch next time and enjoying the leftovers! This beautifully presented dish is full of flavor and is complemented with a green salad on the side. This was my first Hungarian dish and I'm inspired to explore more! I think I'll read up a little on the country of Hungry..

    Happy cooking!! I'll post photos of the dish soon..

    2 onions chopped
    4 Tbsp. oil
    3 Tbsp. Hungarian paprika
    2 tsp. sugar, do not omit
    1/8 Tsp. black pepper or whole pepper corns
    1 bay leaf
    2 Tsp. salt
    4 to 5 lbs. chicken disjointed, use legs and thighs for best flavor, but breast will turn out good as well..
    1 large can of crushed tomatoes
    2 cups water
    2 Tbs. flour
    2 Tbs. butter
    1/2 pt. sour cream (I use plain yogurt)

    Brown onions in oil.
    Add seasonings and chicken, brown 10 minutes. Do not let burn.
    Add tomatoes, bay leaf and water, cover and let simmer slowly until it is tender. It will smell wonderful!
    To thicken gravy, mix into a paste 2 Tbs. soft butter with 2 Tbs. flour and stir into the stew liquid.
    Cook a few minutes until the liquid thickens.
    Serve with dumplings & dollop of sour cream / plain yogurt

    Cheers!

    French Scrambled Eggs / Oeufs Brouilles

    "Grasp the handle of the pan with both hands, thumbs on top, and immediately begin jerking the pan vigorously and roughly toward you at an even, 20-degree angle over the heat, one jerk per second. It is the sharp pull of the pan toward you which throws the eggs against the lid of the pan, then back over its bottom surface. You must have the courage to be rough or the eggs will not loosen themselves from the bottom of the pan. After several jerks, the eggs will begin to thicken... " Julia Child

    The above is an exert (from Julia Child's, "Mastering the Art of French Cooking") taken from the book Julie & Julia (by Julie Powell). As you can see, the French have an interesting relationship with eggs.. My sister visited Paris, France a few years back and came back complaining about the fact that eggs were put practically ever dish they ordered in Paris (my sister is not a fan of the "Egg").. I find it interesting that the French have found so many culinary uses for eggs (when you have a moment, look up all the variations of poached eggs, keyword "Oeufs"). Even scrambled eggs find a place in "Mastering the Art of French Cooking." This morning, I tried scrambled Eggs, ah la French Style... Be careful as to not heat up your pan to high to begin with.. Everyone I know adds milk/cream to the eggs before they are cooked, but not Julia Child! My husband described the eggs as delicate, fluffy and very tasty (this works for me ;).... They were different from the scrambled eggs I usually make, but I enjoyed the process much more.. The French Scrambled egg is more of an art form, the process makes you feel like you've actually created something worthy of the term culinary art..

    Scrambled eggs in French are creamy soft curds that just hold their shape from fork to mouth. As stated in Mastering the Art of French Cooking, "Their preparation is a matter of stirring the eggs over gentle heat until they slowly thicken as a mass into a custard."

    What you will need:

    Fork or wire whip
    Mixing bowl
    Eggs
    pinch of salt & pepper
    2 Tb softened butter
    Frying pan (the heavier the better)
    Spatula
    Cream and/or butter
    Parsley sprigs (optional)

    Now Julia suggests 8 eggs or 7 eggs and 2 yolks.. I'm only cooking for my husband and I, so I have to shorten the ingredients..

    Beat the eggs in the bowl with salt & pepper for 20 to 30 seconds only

    Smear the bottom and sides of pan with butter (this is not low calorie, the French eat for taste...)
    Pour in the eggs and set over moderately low heat. Stir slowly and continually. Nothing will seem to happen for 2 to 3 minutes as the eggs slowly heat up.

    When you notice the eggs begin to thicken, begin to stir rapidly and jerk the pan back and forth above the heat (see top of this page for helpful hint). Heat until the eggs have thickened to the consistency you desire and remove from heat. The eggs will continue to thicken slightly.

    As soon as you see the eggs are at the consistency you like, stir in the butter and/or cream (this enhances the flavor as well as stops the cooking). I made the mistake of adding the cream when the pan was still on the burner, but they still turned out very good.

    Sprinkle with parsley if you so desire and enjoy!

    *Note
    I like to add cheese (feta), spinach, and sometimes olives in my egg dishes, but I find that in the French style eggs, the cheese works, but not the olives.. Good luck & share your thoughts!!

    Breaded Chicken Roll Ups

    Breaded Chicken Roll Ups

    STRIP STEAKS WITH BALSAMIC CREAM SAUCE

    It really doesn't matter what cut of meat you decide to serve (although, like most things, the better the quality the better the experience), the sauce is what you will remember. Yes it's very simple to make, but it is so delicious (at least I think so).
    To complete the meal, I added some freshly steamed green beans in a garlic and butter sauce, and creamy garlic mashed potatoes (using butter, half/half and roasted garlic).


    "PERFECT EASY MEAL TO SERVE TO GUESTS, OR AS WONDERFUL MEAL FOR THE FAMILY TO ENJOY"

    " TO ENSURE THE MEAT IS SEARED - NOT STEAMED- COOK JUST 3 STEAKS IN THE SKILLET AT A TIME."


    Ingredients
    3 strip steaks (10 to 12 ounces each), about 1 inch thick
    salt and pepper
    1 tablespoon vegetable oil
    1 shallot, minced
    1/4 cup balsamic vinegar
    1/3 cup heavy cream
    2 tablespoons finely chopped fresh chives

    Method
    1. Pat steaks dry with paper towels (Julia Child) and season with salt and pepper. heat oil in large skillet over medium-high until just smoking. Cook steaks until well browned, 3 to 5 minutes per side. Transfer to cutting board and tent with foil.

    2. Add shallots to empty skillet and cook until softened, about 30 seconds. Stir in vinegar, scraping up and browned bits, and cook until syrupy, about 1 minute. Add cream and cook until slightly thickened, about 1 minute. Stir in chives and season with salt and pepper. Slice steak and serve, passing sauce at table or serve with sauce.

    I thoroughly enjoyed the Balsamic Cream Sauce (just ask my husband, he found me in the kitchen after dinner devouring the remains of the sauce from the serving bowl!!).. Let me know if you like it too!!

    Pavlova Dessert


    My husband and I were invited to a Hanukkah party where we were introduced to some wonderfully unique and tasty dishes. The room was full of warm and friendly people and the hostess offered up a great meal and atmosphere. Duck and fish were the two main courses, served with some very creative and unique side dishes with an Asian flair!

    The dessert was what really made the day for me. The hostess was a beautiful and charming gal from New Zealand and she made a traditional New Zealand (or Kiwi) dessert called Pavlova. I highly recommend bringing this dish to a holiday gathering and impressing your friends and family.. The recipe does not call for many ingredients and the method is reads fairly simple. I'm going to attempt to make it for family in the coming weeks (I may have to attempt it a couple of times because though there is a chance it wont turn out the first time, even though the recipe seems pretty simple).

    I know it will take practice to get the dessert to turn out as amazing as my friends did, but I'm up for the challenge. If you want to impress friends and family with a sweet and stunning dessert, I highly recommend making a Pavlova cake. We enjoyed this cake served with whipped cream and chocolate mousse (creamy and sweet), but it is traditionally served with fresh fruit and whipped cream. Enjoy!

    Pavlova Recipe & Method

    Ingredients for Cake:

    4 large (120 grams) egg whites

    1 cup (200 grams) superfine or castor sugar

    1 teaspoon white vinegar

    1/2 tablespoon cornstarch (corn flour)

    Topping:

    1 cup (240 ml) heavy whippingcream

    1 1/2 tablespoons (20 grams) granulated white sugar

    1/2 teaspoon pure vanilla extract

    Fresh fruit - kiwi, strawberries, raspberries, blackberries, passion fruit, peaches, pineapple, or other fruit of your choice. Also can be served with chocolate chips and whipped cream.


    METHOD:

    Preheat oven to 250 degrees F (130 degrees C) and place rack in center of oven. Line a baking sheet with parchment paper and draw a 7 inch (18 cm) circle on the paper.

    In the bowl of your electric mixer, with the whisk attachment, beat the egg whites on medium-high speed until they hold soft peaks. Start adding the sugar, a tablespoon at a time, and continue to beat until the meringue holds very stiff peaks. (Test to see if the sugar is fully dissolved by rubbing a little of the meringue between your thumb and index finger. The meringue should feel smooth, not gritty. If it feels gritty the sugar has not fully dissolved so keep beating until it feels smooth between your fingers). Sprinkle the vinegar and cornstarch over the top of the meringue and, with a rubber spatula, fold in.

    Gently spread the meringue inside the circle drawn on the parchment paper, smoothing the edges.

    Bake for 1 hour 15 minutes or until the outside is dry and takes on a very pale cream color. Turn the oven off, leave the door slightly ajar, and let the meringue cool completely in the oven. (The outside of the meringue will feel firm to the touch, if gently pressed, but as it cools you will get a little cracking and you will see that the inside is soft and marshmallowy.)

    The cooled meringue can be made and stored in a cool dry place, in an airtight container, for a few days.

    Just before serving gently place the meringue onto a serving plate. Whip the cream in your electric mixer, with the whisk attachment, until soft peaks form. Sweeten with the sugar and vanilla and then mound the softly whipped cream into the center of the meringue. Arrange the fruit randomly, or in a decorative pattern, on top of the cream. Serve immediately as this dessert does not hold for more than a few hours.

    Serves 6 to 8.


    Hot cocoa for the winter soul.....


    The Saucy Chef here...I am a huge fan of hot cocoa (I'll take a hot cocoa over coffee any day!). In fact, I can drink a good hot cocoa at any time the year. This "almost obsession" started when I was in Rome last October. I happened to order a hot cocoa on a chilly morning at a little cafe just around the corner from our hotel. What I ended up drinking was "liquid bliss!" Although a bit more bitter then what I was used to (sugar packets do the trick), the quality of the chocolate and the richness (and thickness) of the drink took a hold on me (my husband said it was like drinking a melted chocolate bar, and he was right). I have been on a quest to find hot cocoa in the states that compares to the one I sipped in Rome. And, now that the Fall and Winter months are upon us, I am excited to spend my weekends enjoying my new favorite treat! I invite you to begin searching for the sweetest, richest, most luxuries hot cocoas you can find (and share your finds with me). To help you on your way, I recommend starting at Ginger Elizabeth in Midtown Sacramento (no they are not paying me to promote their business). And, by the way, always say yes to whipped cream!

    A Cocoa Fact: Cocoa dates back to the Aztecs. To the Aztec's, the cocoa beans were valuable not only for their culinary importance, but also used as a form of currency.

    This is a super easy dish to prepare. My husband loves it and asked me to add it to our regular weekly menu. I plan to serve the smaller versions as an appetizer at future dinner gatherings.

    I'm always trying to think of new ways to prepare chicken and this dish really fit the bill. I'm going to walk you through the recipe as I prepared it for two (you can always alter the amount of ingredients and seasonings to fit your culinary needs). Chicken is very versatile, as is this dish. The chicken comes out really juicy and full of wonderful flavor. I served it with little red potatoes (baked) and sauteed green beans (w/dill and chopped tomatoes)

    Chicken Roll Up Ingredients:

    2 large boneless/skinless chicken breasts - each sliced in half (through the middle of the breast) to create 4 pieces (or keep intact for larger individual servings)
    1 cup of breadcrumbs (I used Italian seasoned, but you can easily add your own herbs to create your own personal flavor)
    Sliced Matzorella cheese (1 to 2 slices per chicken slice)
    Fresh Spinach leaves ( 2 to 3 per chicken slice)
    Dried Thyme (used in many French dishes)
    2 Garlic cloves (crushed)
    2 to 3 Tablespoons Butter
    Salt (Kosher if you have it)
    Pepper

    Directions:

    Butter a medium size baking dish
    Set oven to 400 degrees

    -Pound the chicken slightly to flatten
    -Dredge one side (outer side) of breast in breadcrumbs
    -Sprinkle with Salt & pepper and Thyme on the inner side
    -Rub 1/2 teaspoon of crushed garlic on each breast
    -Add 1 to 2 slices of cheese
    -Place spinach leaves over the cheese
    -Roll and insert toothpicks to keep the chicken intact

    Place chicken wraps on buttered backing dish (I add a little extra butter - nice and French)
    Bake for approximately 30 min

    Enjoy!

    *Note*
    It was easier for me to fill and wrap the chicken and then roll the chicken in the breadcrumbs.