Monday, December 21, 2009

Two Hanukkah dishes to share...


Hanukkah was wonderful this year. We hosted a family party and for the first time ever, I timed everything right! This was mostly due to my husband (Shaun). Shaun helped me manage my time. The first dish I prepared was home made Apple sauce.  I'd never made it before, but my sister had attended a Hanukkah party earlier in the week and told me how tasty the home made sauce compared to the store bought. Since, I'm always interested in trying something new,  I decided to give it a try. It turned out so yummy! Fresh and sweet and with so much more texture.  I highly recommend making home made (FRESH) apple sauce (it's super easy!!)..


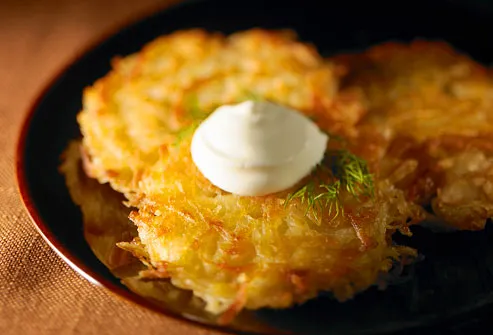
I also ended up making a wonderfully tasty corned beef. I was nervous about making it, but I've heard that corned beef is fairly fuss free and easy. I don't know about you, but I LOVE eating good corned beef.  Jews are known for enjoying a nice corned beef on Jewish Marble rye, so I decided to serve it for my family Hanukkah party. The recipe I used called for beer, and since I've never actually cooked with beer, I was a bit apprehensive, but it turned out to be super easy and the end result was outstanding! My husband told me it was the best corned beef he'd ever had. This recipe is a keeper! Enjoy the recipes...


Apple Sauce Recipe
Preparation time: 45 minutes. The sugar amounts are just guidelines, depending your taste, and on the sweetness of your apples, use less or more. If you use less sugar, you'll likely want to use less lemon juice. The lemon juice brightens the flavor of the apples and balances the sweetness.


Ingredients
  • 3 to 4 lbs of peeled, cored, and quartered apples. (Make sure you use a good cooking apple like Golden Delicious, Granny Smith, Fuji, Jonathan, Mcintosh, or Gravenstein.)
  • 3 inches of cinnamon stick
  • 1/4 cup of dark brown sugar
  • up to 1/4 cup of white sugar
  • 1 cup of water
  • 1/2 teaspoon of salt
  • 1/3 cup maple syrup 

  • METHOD
1 Put all ingredients into a large pot. Cover. Bring to boil. Lower heat and simmer for 20-30 minutes.
2 Remove from heat. Remove cinnamon sticks. Mash with potato masher.
Ready to serve, either hot or refrigerated. Delicious with vanilla ice cream or vanilla yogurt.

Hanukkah Corned Beef 
Slow Cooked Corned Beef for Sandwiches Recipe

INGREDIENTS

  • 1-1/3 (3 pound) corned beef briskets with spice packets 
  • 1-1/3 (12 fluid ounce) bottles beer (I used guinness)
  • 1-1/3 bay leaves
  • 2 tablespoons and 2 teaspoons peppercorns
  • 2/3 bulb garlic cloves, separated and peeled


METHOD
  1. Place the corned beef briskets into a large pot. Sprinkle in one of the spice packets, and discard the other one or save for other uses. Pour in the beer, and fill the pot with enough water to cover the briskets by 1 inch. Add the bay leaves, peppercorns and garlic cloves. Cover, and bring to a boil.
  2. Once the liquid comes to a boil, reduce the heat to medium-low, and simmer for 4 to 5 hours, checking hourly, and adding more water if necessary to keep the meat covered.
  3. Carefully remove the meat from the pot, as it will be extremely tender. Set on a cutting board, and allow it to rest until it firms up a bit, about 10 minutes. Slice or shred to serve. I discard the cooking liquid, but it can be used to cook cabbage and other vegetables if desired.


Saturday, December 5, 2009

What's For Hanukkah Dinner?


Yes, it's that wonderful time of year! 
Chanukah is just around the corner. I know the holiday season is officially here because my husband has graciously taken the decorations down from the attic, without me even having to even ask - it's a hanukah miracle!  (Yes Virgina, Jews do decorate for the holidays)! Blue, silver, gold, and sometimes yellow are the traditional colors of  this festive holiday. When you see someone's house decorated with blue lights instead of white, red, or green it's probably a good indicator that the folks inside may very well be celebrating the "Festival of Lights," Chanukah! Inside their homes (and mine) you might find sparkling six-pointed stars, dreidels, lights, and menorahs, all carefully placed around their homes  ~ awaiting the cherished celebration. You might also find a few shiny gold wrapped chocolate coins (but those won't last very long). Now that the stage has been sit, all we can do is wait.. Soon we will be indulging in the tastes of savory friend Potato Pancakes (Latkes!), scrumptious Jelly filled donuts,  cream filled sweet blitzes, and more traditional Hanukah foods! I don't know if you've caught on yet, but there is a theme to the food prepared at Hanukkah. Besides satisfying everyones sweet tooth, the Festival of Lights is celebrated by eating foods cooked in oil! The foods of Chanukah are fried in oil to symbolize the great miracle of the oil that lit the Jewish people's way to victory so many years ago...  This is not a very good description of the Jewish Holiday.. To find out more, check out the following website: http://judaism.about.com/od/chanukah/a/hanukkahstory.htm


What's cooking at Hanukkah (Chanukah)


LATKES LATKES LATKES!!!


INGREDIENTS      
1 vitamin C tablet
2 tablespoons hot water
2 1/2 pounds peeled russet potatoes
1 peeled onion
2 tablespoons matzo meal
2 large eggs, lightly beaten
1 teaspoon salt
1/4 teaspoon baking powder
Vegetable oil, for frying
Applesauce and/or sour cream, for serving


INSTRUCTIONS
  1. Place vitamin C tablet in a small bowl with hot water and stir to dissolve (A little orange or lemon juice will work also). Shred potatoes first using the shredding blade and then the metal blade of a food processor (or use a hand shredder). Add to vitamin C mixture.
  2. Shred onion in the food processor just as you shredded the potatos; add to potatoes. Add matzo meal (Flour can be substituted), eggs, salt, and baking powder and stir until incorporated.
  3. Pour 1/4 to 1/2 inch of oil into a large frying pan and heat over medium-high heat. Once oil is to temperature (you can check by sticking a wooden utensil into the oil and seeing if bubbles form), spoon 2 tablespoons of the potato mixture into the hot oil. Do not crowd the pan. Flatten latkes slightly with the back of the spoon.
  4. Fry pancakes until golden on both sides, turning once. When you reach the end of the batter, pat the mixture with a paper towel to remove excess liquid.
  5. After frying, remove the pancakes to paper towels to drain. Season with additional salt and serve with applesauce and/or sour cream, if desired. Pancakes may be kept warm in low oven on baking sheet in a single layer for 1 hour.  Now Eat My Darlings!!!


    QUICK AND EASY JELLY DOUGHNUTS (SWEET SUFGANIOT)!!


    This recipe is designed for those who want to have doughnuts at the holiday, but need to save some time.. Perfect cooking project for the kids.. We like to get the whole family involved.. These are so good!! Enjoy!!


    INGREDIENTS                                                                        


    1 package Pillsbury Biscuits 
    Lots of canola oil
    Strawberry, Grape, or your favorite jelly 
    Confectioners sugar (to coat)
    Optional - 2 large carrots, chopped into big slices (to help absorb the oil)
    Optional - Doughnut Toppers (your favorite sprinkles, etc..) 


    INSTRUCTIONS                                             
    1. Put canola oil in a large frying pan and heat to medium (fill about half way).
    2. Add carrots slices.
    3. Separate biscuits, fill each biscuit with teaspoon of jelly
    4. Fold up the biscuits (just pinch edges together to form balls)
    5. Add the biscuits, a few at a time so they don’t overfill the pan.
    6. Lightly fry the biscuits until golden brown, about 2 minutes.
    7. Remove from the pan and place on a plate. (Line the plate with a paper towel to absorb the remaining oil.)

    THE CELEBRATION OF CHANUKAH LASTS FOR 8 DAYS.. COME COOK WITH ME.. SHARE YOUR HOLIDAY FAVORITE RECIPES AND STORIES!! 

    HAPPY HOLIDAYS... NOW EAT MY DARLINGS!!!

    Breaded Chicken Roll Ups

    Breaded Chicken Roll Ups

    STRIP STEAKS WITH BALSAMIC CREAM SAUCE

    It really doesn't matter what cut of meat you decide to serve (although, like most things, the better the quality the better the experience), the sauce is what you will remember. Yes it's very simple to make, but it is so delicious (at least I think so).
    To complete the meal, I added some freshly steamed green beans in a garlic and butter sauce, and creamy garlic mashed potatoes (using butter, half/half and roasted garlic).


    "PERFECT EASY MEAL TO SERVE TO GUESTS, OR AS WONDERFUL MEAL FOR THE FAMILY TO ENJOY"

    " TO ENSURE THE MEAT IS SEARED - NOT STEAMED- COOK JUST 3 STEAKS IN THE SKILLET AT A TIME."


    Ingredients
    3 strip steaks (10 to 12 ounces each), about 1 inch thick
    salt and pepper
    1 tablespoon vegetable oil
    1 shallot, minced
    1/4 cup balsamic vinegar
    1/3 cup heavy cream
    2 tablespoons finely chopped fresh chives

    Method
    1. Pat steaks dry with paper towels (Julia Child) and season with salt and pepper. heat oil in large skillet over medium-high until just smoking. Cook steaks until well browned, 3 to 5 minutes per side. Transfer to cutting board and tent with foil.

    2. Add shallots to empty skillet and cook until softened, about 30 seconds. Stir in vinegar, scraping up and browned bits, and cook until syrupy, about 1 minute. Add cream and cook until slightly thickened, about 1 minute. Stir in chives and season with salt and pepper. Slice steak and serve, passing sauce at table or serve with sauce.

    I thoroughly enjoyed the Balsamic Cream Sauce (just ask my husband, he found me in the kitchen after dinner devouring the remains of the sauce from the serving bowl!!).. Let me know if you like it too!!

    Pavlova Dessert


    My husband and I were invited to a Hanukkah party where we were introduced to some wonderfully unique and tasty dishes. The room was full of warm and friendly people and the hostess offered up a great meal and atmosphere. Duck and fish were the two main courses, served with some very creative and unique side dishes with an Asian flair!

    The dessert was what really made the day for me. The hostess was a beautiful and charming gal from New Zealand and she made a traditional New Zealand (or Kiwi) dessert called Pavlova. I highly recommend bringing this dish to a holiday gathering and impressing your friends and family.. The recipe does not call for many ingredients and the method is reads fairly simple. I'm going to attempt to make it for family in the coming weeks (I may have to attempt it a couple of times because though there is a chance it wont turn out the first time, even though the recipe seems pretty simple).

    I know it will take practice to get the dessert to turn out as amazing as my friends did, but I'm up for the challenge. If you want to impress friends and family with a sweet and stunning dessert, I highly recommend making a Pavlova cake. We enjoyed this cake served with whipped cream and chocolate mousse (creamy and sweet), but it is traditionally served with fresh fruit and whipped cream. Enjoy!

    Pavlova Recipe & Method

    Ingredients for Cake:

    4 large (120 grams) egg whites

    1 cup (200 grams) superfine or castor sugar

    1 teaspoon white vinegar

    1/2 tablespoon cornstarch (corn flour)

    Topping:

    1 cup (240 ml) heavy whippingcream

    1 1/2 tablespoons (20 grams) granulated white sugar

    1/2 teaspoon pure vanilla extract

    Fresh fruit - kiwi, strawberries, raspberries, blackberries, passion fruit, peaches, pineapple, or other fruit of your choice. Also can be served with chocolate chips and whipped cream.


    METHOD:

    Preheat oven to 250 degrees F (130 degrees C) and place rack in center of oven. Line a baking sheet with parchment paper and draw a 7 inch (18 cm) circle on the paper.

    In the bowl of your electric mixer, with the whisk attachment, beat the egg whites on medium-high speed until they hold soft peaks. Start adding the sugar, a tablespoon at a time, and continue to beat until the meringue holds very stiff peaks. (Test to see if the sugar is fully dissolved by rubbing a little of the meringue between your thumb and index finger. The meringue should feel smooth, not gritty. If it feels gritty the sugar has not fully dissolved so keep beating until it feels smooth between your fingers). Sprinkle the vinegar and cornstarch over the top of the meringue and, with a rubber spatula, fold in.

    Gently spread the meringue inside the circle drawn on the parchment paper, smoothing the edges.

    Bake for 1 hour 15 minutes or until the outside is dry and takes on a very pale cream color. Turn the oven off, leave the door slightly ajar, and let the meringue cool completely in the oven. (The outside of the meringue will feel firm to the touch, if gently pressed, but as it cools you will get a little cracking and you will see that the inside is soft and marshmallowy.)

    The cooled meringue can be made and stored in a cool dry place, in an airtight container, for a few days.

    Just before serving gently place the meringue onto a serving plate. Whip the cream in your electric mixer, with the whisk attachment, until soft peaks form. Sweeten with the sugar and vanilla and then mound the softly whipped cream into the center of the meringue. Arrange the fruit randomly, or in a decorative pattern, on top of the cream. Serve immediately as this dessert does not hold for more than a few hours.

    Serves 6 to 8.


    Hot cocoa for the winter soul.....


    The Saucy Chef here...I am a huge fan of hot cocoa (I'll take a hot cocoa over coffee any day!). In fact, I can drink a good hot cocoa at any time the year. This "almost obsession" started when I was in Rome last October. I happened to order a hot cocoa on a chilly morning at a little cafe just around the corner from our hotel. What I ended up drinking was "liquid bliss!" Although a bit more bitter then what I was used to (sugar packets do the trick), the quality of the chocolate and the richness (and thickness) of the drink took a hold on me (my husband said it was like drinking a melted chocolate bar, and he was right). I have been on a quest to find hot cocoa in the states that compares to the one I sipped in Rome. And, now that the Fall and Winter months are upon us, I am excited to spend my weekends enjoying my new favorite treat! I invite you to begin searching for the sweetest, richest, most luxuries hot cocoas you can find (and share your finds with me). To help you on your way, I recommend starting at Ginger Elizabeth in Midtown Sacramento (no they are not paying me to promote their business). And, by the way, always say yes to whipped cream!

    A Cocoa Fact: Cocoa dates back to the Aztecs. To the Aztec's, the cocoa beans were valuable not only for their culinary importance, but also used as a form of currency.

    This is a super easy dish to prepare. My husband loves it and asked me to add it to our regular weekly menu. I plan to serve the smaller versions as an appetizer at future dinner gatherings.

    I'm always trying to think of new ways to prepare chicken and this dish really fit the bill. I'm going to walk you through the recipe as I prepared it for two (you can always alter the amount of ingredients and seasonings to fit your culinary needs). Chicken is very versatile, as is this dish. The chicken comes out really juicy and full of wonderful flavor. I served it with little red potatoes (baked) and sauteed green beans (w/dill and chopped tomatoes)

    Chicken Roll Up Ingredients:

    2 large boneless/skinless chicken breasts - each sliced in half (through the middle of the breast) to create 4 pieces (or keep intact for larger individual servings)
    1 cup of breadcrumbs (I used Italian seasoned, but you can easily add your own herbs to create your own personal flavor)
    Sliced Matzorella cheese (1 to 2 slices per chicken slice)
    Fresh Spinach leaves ( 2 to 3 per chicken slice)
    Dried Thyme (used in many French dishes)
    2 Garlic cloves (crushed)
    2 to 3 Tablespoons Butter
    Salt (Kosher if you have it)
    Pepper

    Directions:

    Butter a medium size baking dish
    Set oven to 400 degrees

    -Pound the chicken slightly to flatten
    -Dredge one side (outer side) of breast in breadcrumbs
    -Sprinkle with Salt & pepper and Thyme on the inner side
    -Rub 1/2 teaspoon of crushed garlic on each breast
    -Add 1 to 2 slices of cheese
    -Place spinach leaves over the cheese
    -Roll and insert toothpicks to keep the chicken intact

    Place chicken wraps on buttered backing dish (I add a little extra butter - nice and French)
    Bake for approximately 30 min

    Enjoy!

    *Note*
    It was easier for me to fill and wrap the chicken and then roll the chicken in the breadcrumbs.